Introduction
Free WebM to MP3 Converter is a program that converts WebM, MP4, FLV and 3GP files to MP3 or WAV format. Movies in these formats are used by most popular video sites (eg YouTube, Metacafe, Yahoo! Video). Additionally, the program allows you to extract original audio tracks from supported files without loss of sound quality.
Free WebM to MP3 Converter is an absolutely free application (for personal and commercial use) and you can download it here.
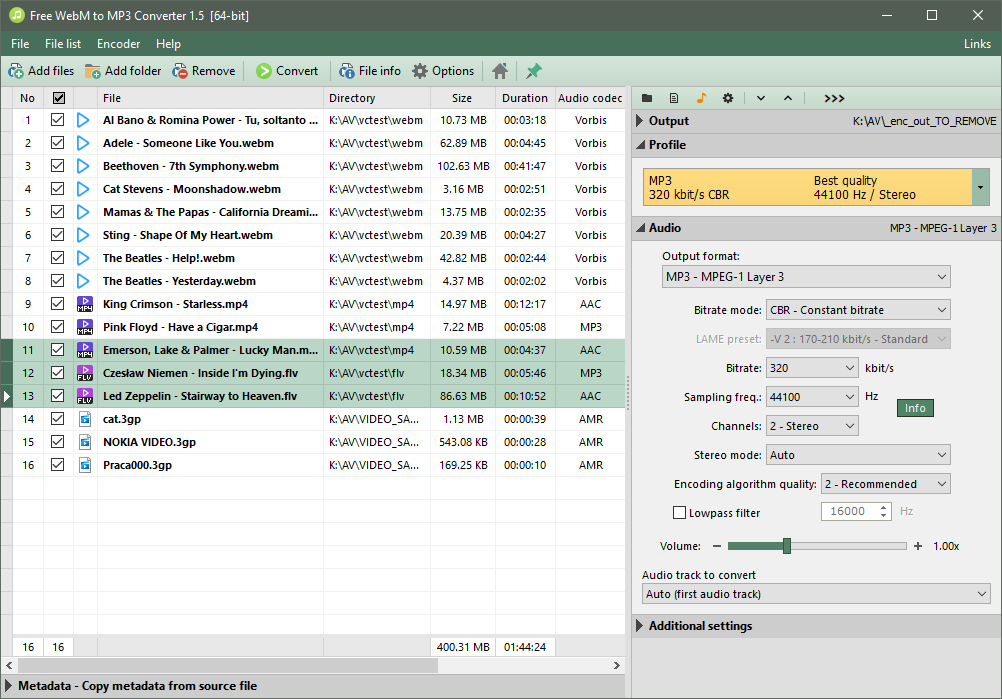
Main window
Converting files
To convert or extract audio tracks from WebM, MP4, FLV and 3GP files, you must first add them to the list. To do this, click the button on the toolbar. Will be displayed a standard dialog box for file selection, in which you have to select one or more audio or video files, and click button. You can also add files to the list using the drag and drop technique. When you do this, the program will add your selected files to the processing list. To run the conversion, on the list must be at least one file, moreover, it must be checked in the column with check boxes (the 2-nd column on the picture above).
If you ran the program for the first time and have not changed any conversion parameters, will be used default settings.
At default settings, the application converts files to MP3 with constant bitrate (CBR) and automatically selects all the encoding parameters so as to preserve the original audio quality and get the smallest MP3 files.
You can manually set the encoding parameters on the Audio and Additional settings panels, or just select one of the predefined profiles from the Profile list.
If you want to extract the original audio track from the video file without loss of sound quality, select Try extract original audio stream on the Output format list.
The program can extract the audio tracks encoded in the following formats: MP3, AAC, M4A, OGG (Vorbis), AC-3, PCM (WAV), AMR, WMA.
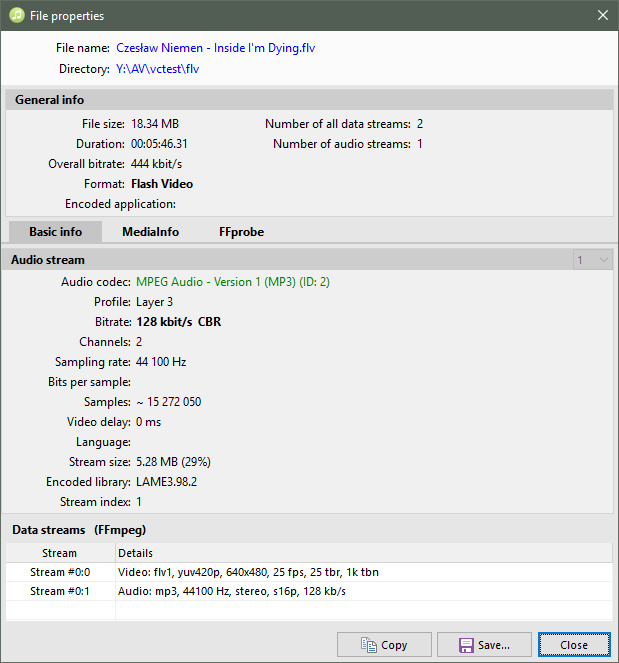
The most important audio conversion parameter is audio bitrate. Generally, the higher bitrate, the better sound quality in the output file. But on the other hand, the higher bitrate, the larger output file. The whole trick is to select those bitrate value to get good sound quality at a relatively small size of the resulting file. So it is best to set the audio bitrate in Auto position, then the program will select the appropriate value automatically. However, if you want to manually set conversion parameters, you can find a lot of useful information in the File properties window (select desired file on the list and press F10).
If you want to reset all conversion settings to default values, select menu → .
When you set all conversion parameters, click the button on the toolbar. A new window appears, where you can track the conversion process.
By default, all metadata are copied from the source files to output files, but he program also lets you add custom metadata (artist, album, title, year, comment etc.). If you want, you can also completely disable writing metadata to output files.
Managing file list
You can activate/deactivate any files in the list by checking/unchecking desired files in the 2-nd column (with the checkboxes). Only the checked files will be processed during conversion.
If you want to remove from the list some files, check them in the 2-nd column and click button on the toolbar. All checked files will be removed from the list (but not from disk!). If you want to remove from the list all files, select menu → .
You can change the location of files in the list using the drag and drop. Similarly, you can move the list columns.
If you want to show or hide some column, right-click on the file list header, and in the context menu, select or deselect the desired column.
You can sort (ascending or descending) the displayed information by clicking the appropriate column header.
Loading & saving settings
When you close the program, all conversion settings are saved to the file __Last.ini in the profiles directory. The next time you run application, conversion settings are loaded from this file.
The rest of the application settings (main window size and location, columns order and visibility, and others) are stored in the file WebMToMp3.ini in the program main directory. Of course, these settings are also loaded at the next startup.
Portability
The program does not use system registry and all settings are stored in the above-mentioned files. If you want, you can copy all files (including whole directory structure) to the USB drive, and run the program from that drive on other computers.
You can also download the program in the form of a ZIP archive and extract it to an external drive.